If you are using Hostinger and have recently encountered a critical issue stating “Background updates are not working as expected,” you can certainly resolve it by following certain steps. In this article, we will discuss some scenarios that might be causing this error. Let’s explore the step-by-step process on how to resolve the disabled automatic updates issue when using Hostinger.
Critical Issue
“Background updates are not working as expected” because:
- “The
automatic_updater_disabledfilter is enabled.”
- “All automatic updates are disabled.”
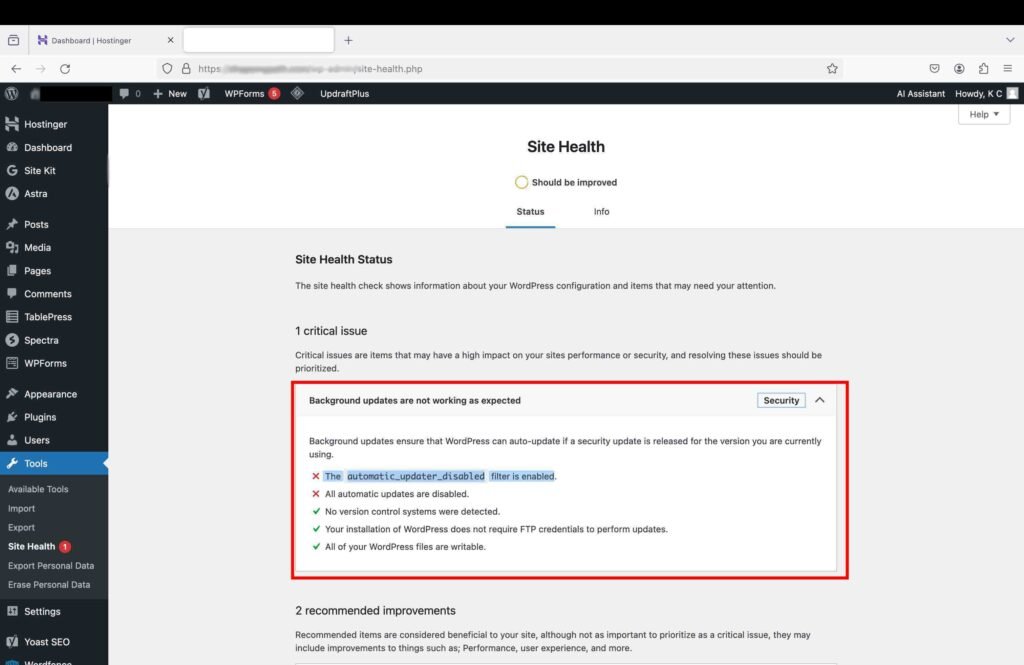
If you have encountered this issue, you should also see a related issue under the recommended improvements section. The issue will state that “Your site may have problems auto-updating plugins and themes.“
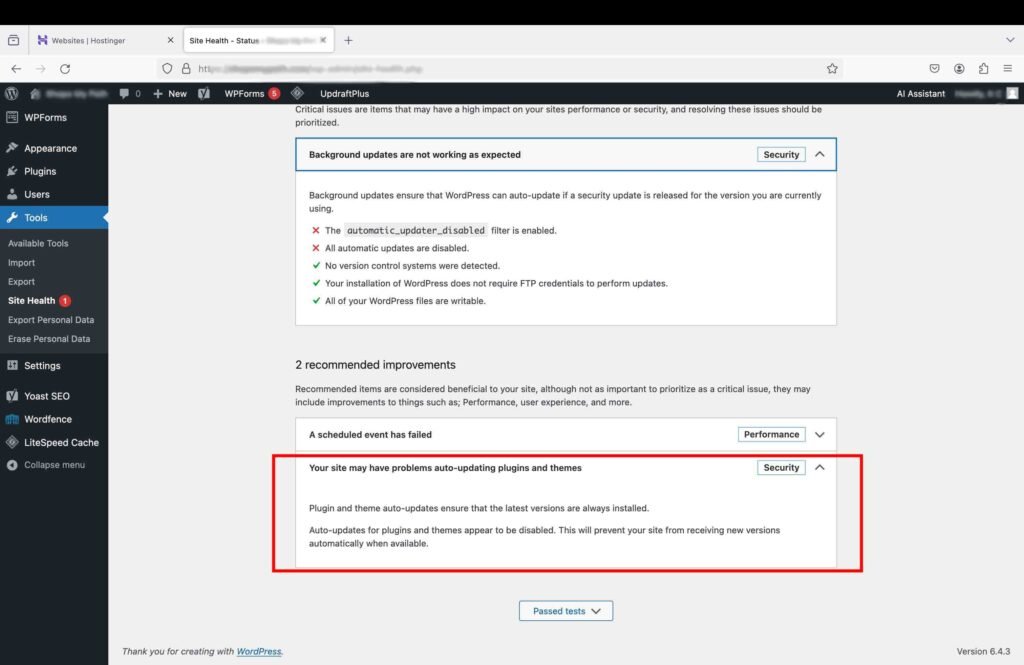
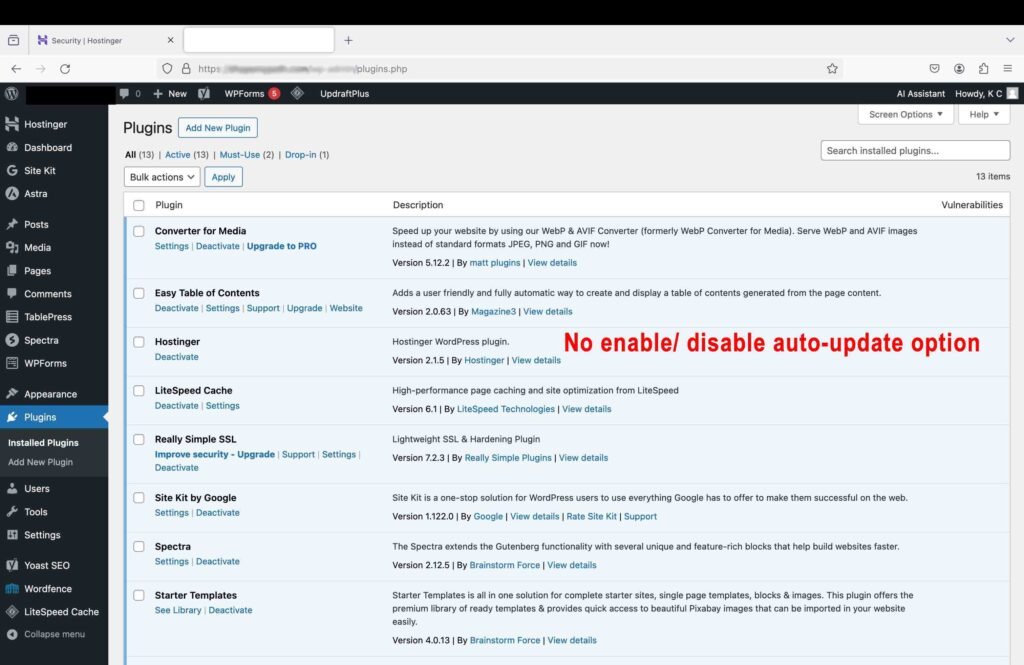
Additionally, because the automatic updates are disabled, you will not see any “Enable or Disable Auto-Updates” options against the installed plugins on the “Plugins” page.
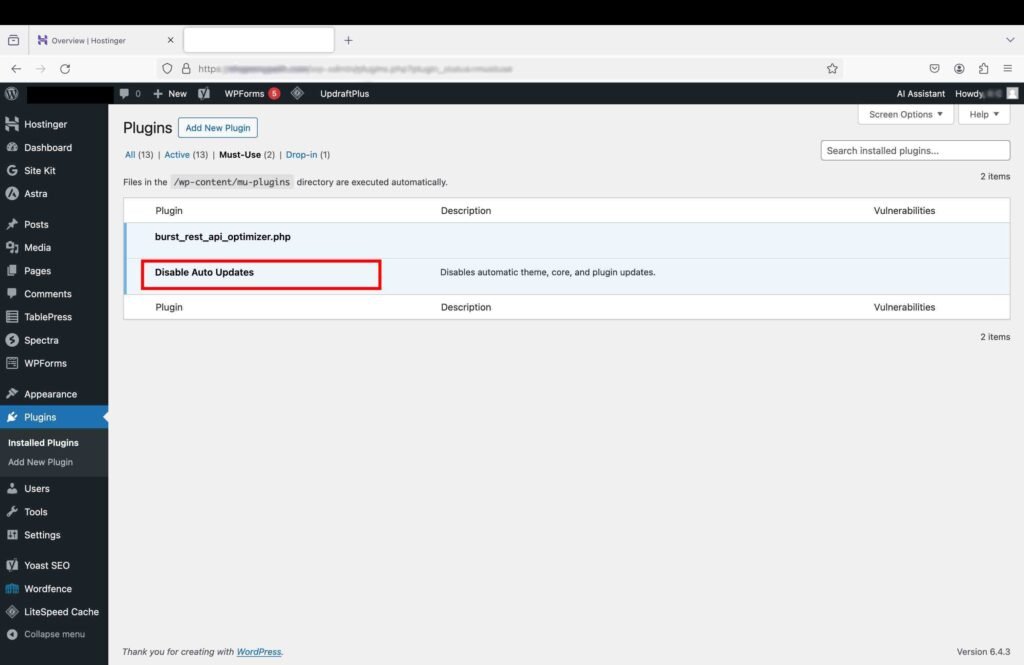
If you see this issue, there should be an MU plugin that is being executed automatically.
- Go to the plugins section.
- Click “Must-Use” at the top.
You should see an MU plugin named “Disable Auto Updates.” If there is one, you need to investigate why this MU plugin was generated in the first place.
Possible Issue: Hostinger hPanel Settings
1. Update the hPanel Settings
This issue can occur if you are on a Hostinger premium plan and you have turned on the automatic updates for WordPress core in hPanel. Hostinger does not offer automatic updates for themes and plugins in the premium plan. Therefore, when you turned on this setting, it only enabled the automatic updates for WordPress core, while disabling the automatic updates for themes and plugins. You can definitely check this in the Hostinger hPanel settings.
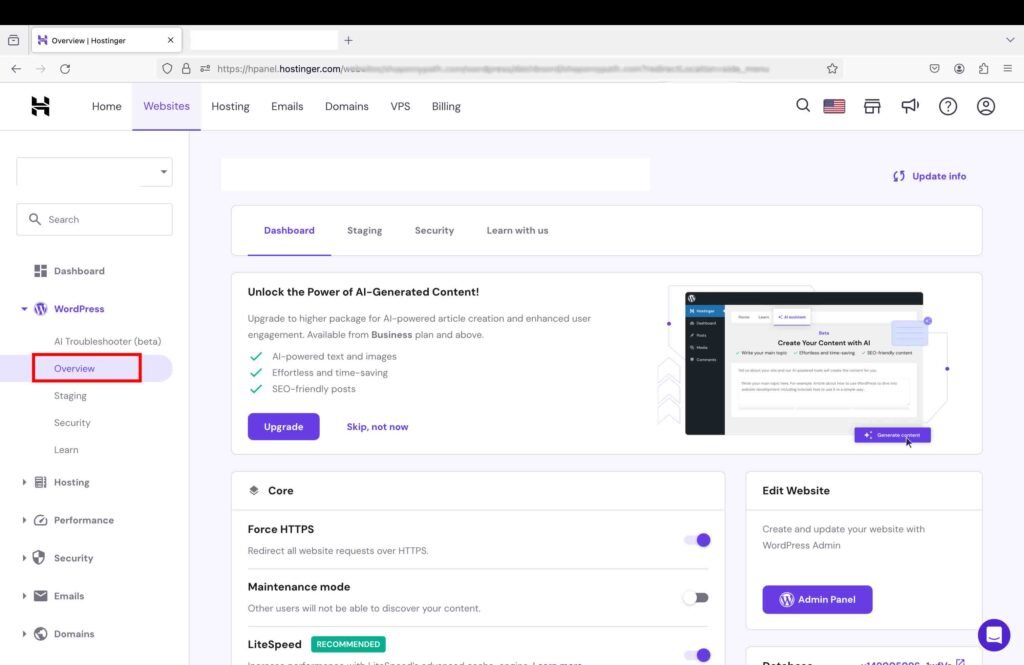
- Go to the “Overview” sub-section under the WordPress section of the Hostinger hPanel dashboard.
- Click the “Change” button against “WordPress Updates” in the “Core” tab.
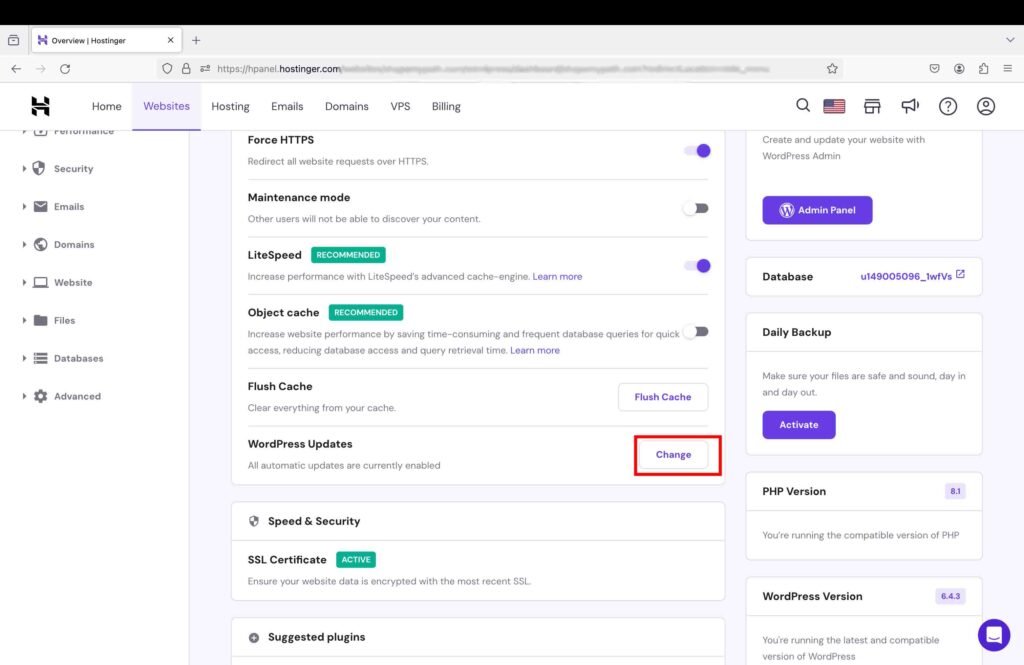
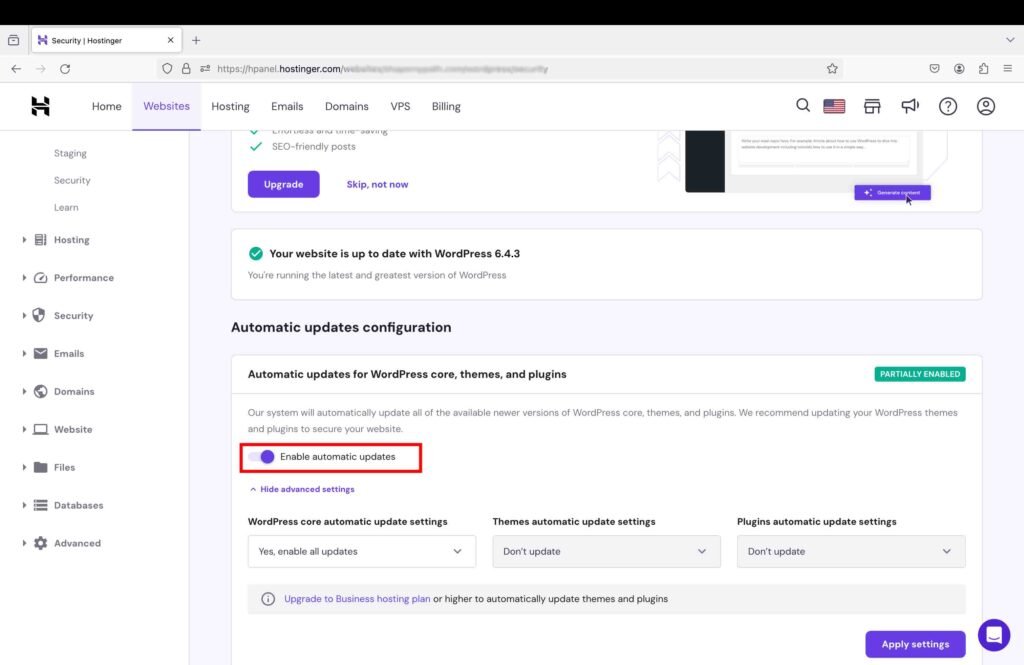
If you are on the Hostinger Premium plan, you can see that the option to change the update settings for themes and plugins is grayed out. This is because the auto-updates option for themes and plugins is only available in the business and cloud startup plans and not in the basic premium plan.
- Toggle off the “Enable Automatic Updates” to remove the MU plugin causing the critical issue.
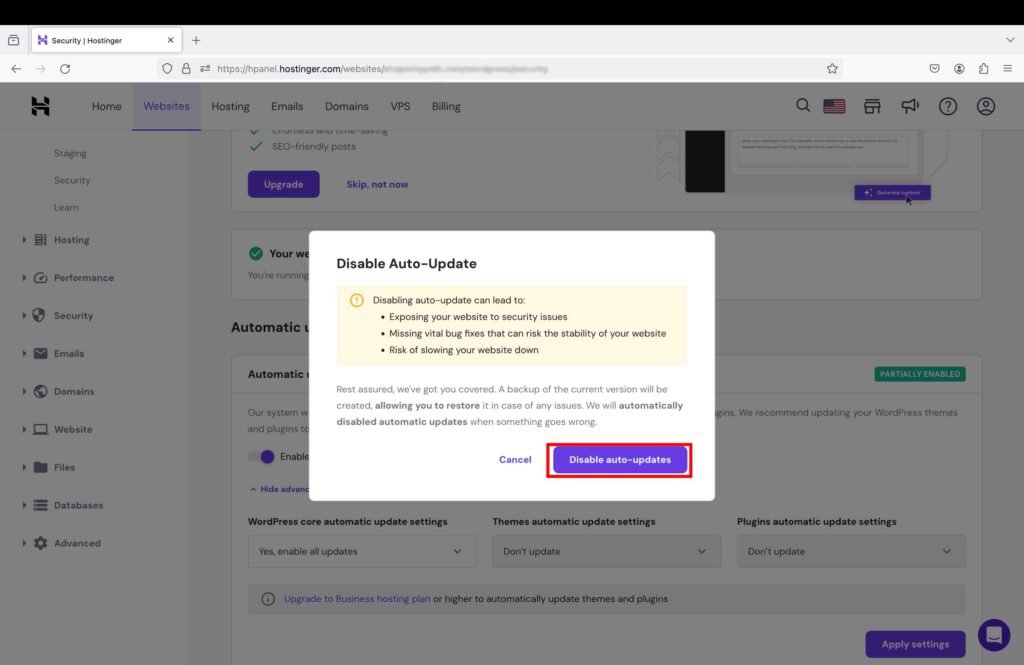
Once you toggle off the option, a pop-up window will appear.
- Click the “Disable Auto-updates” button on the pop-up window.
2. Resolve the Resulting WP_AUTO_UPDATE_CORE ISSUE
After you have disabled the auto-updates, another critical issue will arise stating that “The WP_AUTO_UPDATE_CORE constant is defined as false.” This is because after turning off the auto-updates, Hostinger’s new settings will make an update to the configuration.php file of your WordPress site to turn off the automatic updates for WordPress core as well.
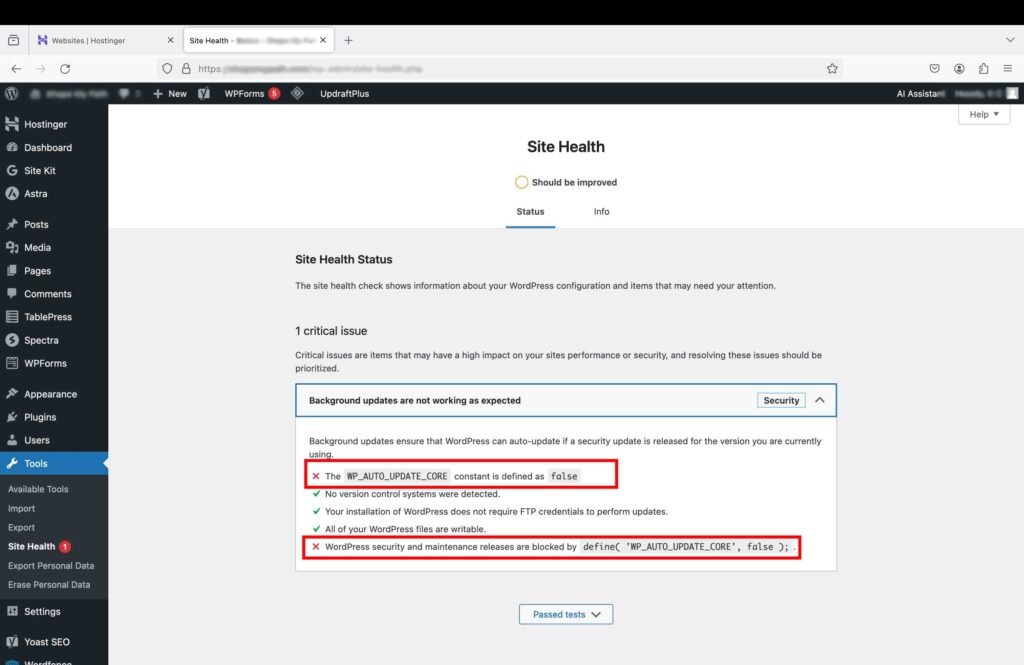
To turn on the automatic updates for WordPress core, you need to make changes to the “wp-configure.php” file.
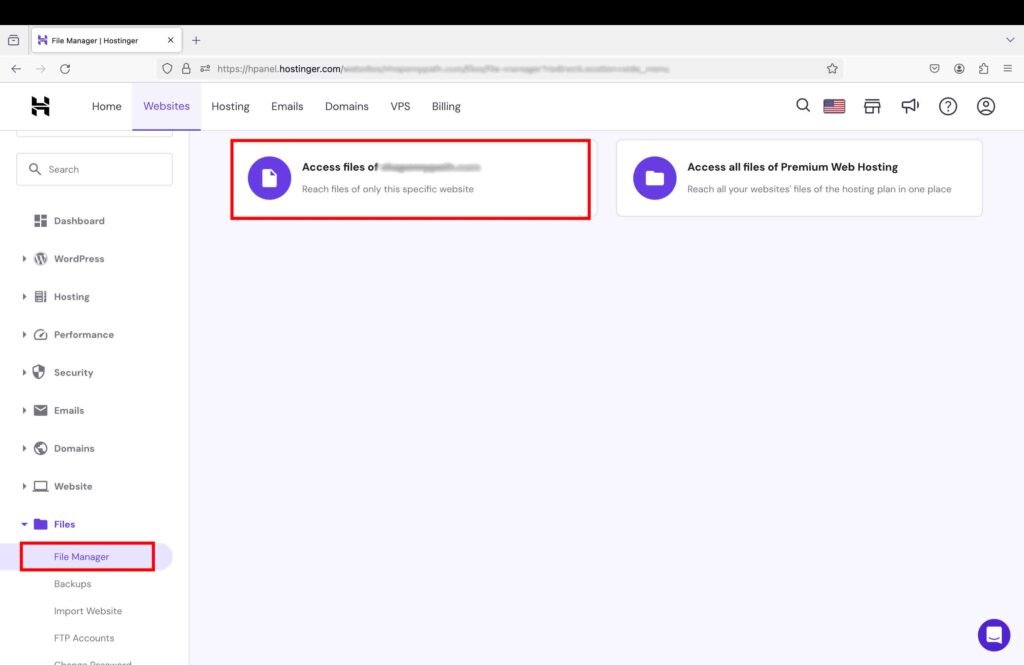
- Click “File Manager” under the “Files” menu item on the Hostinger hPanel.
- Click on the “Access files of [website name]” tab.
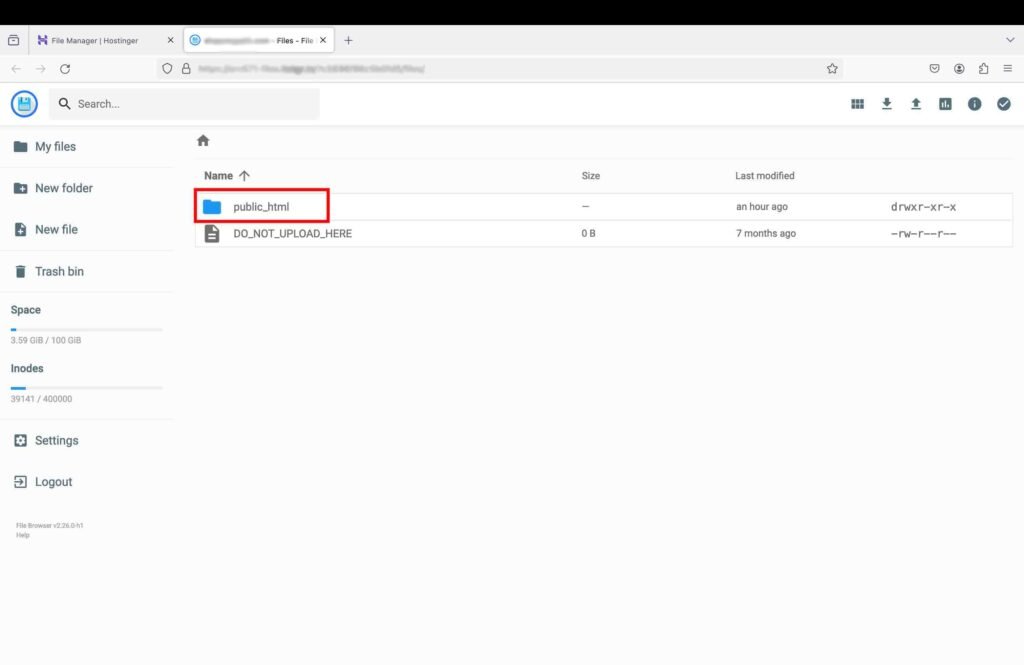
- Click the “public_html” folder to access the files.
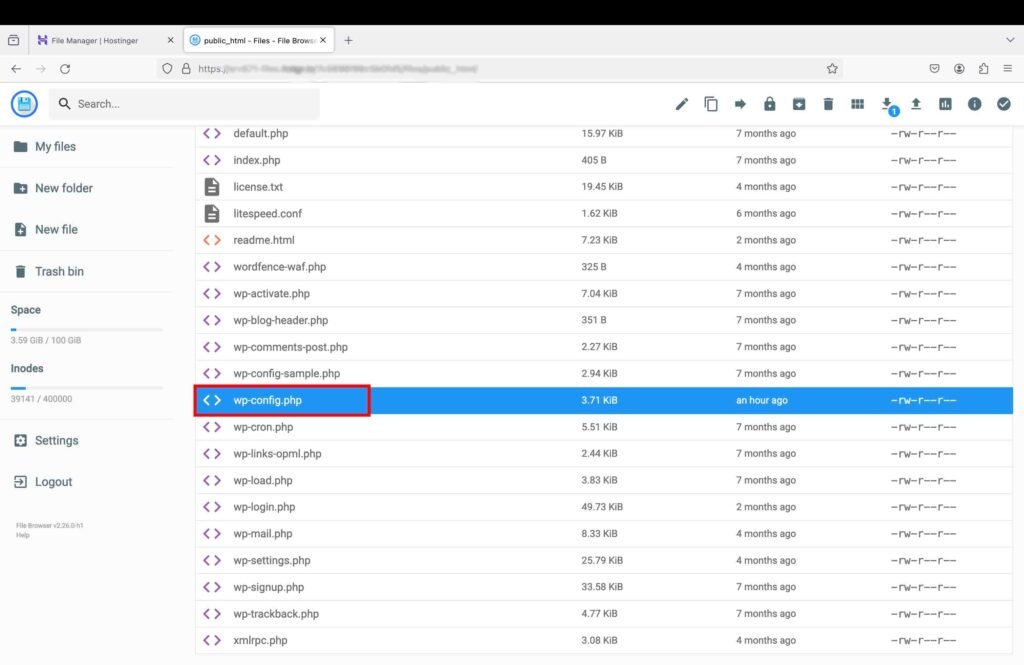
- Double-click the “wp-config.php” file to open it.
- Inside the “wp-config.php” file, change the value from “false” to “true” in the code:
“define( ‘WP_AUTO_UPDATE_CORE’, false).”
- Click the save button at the top right corner of the screen.

Once you update the value, this critical issue will disappear.
2. Other Scenarios
When you have recently encountered the error “The automatic_updater_disabled filter is enabled” in the Site Health section and the first scenario is not applicable, check if:
A. You have recently installed a plugin or theme.
B. There is a recent update to a plugin or theme.
- Deactivate the plugin or theme to see if this resolves the issue.
If you cannot identify the source, consult your hosting provider to check if there are any hosting settings that might be causing this issue.
Please let us know in the comments section if there are any other scenarios where you encountered this issue and how you resolved it. This will certainly benefit other people in a similar situation.
Written by Kash. The author is a WordPress Subject Matter Expert and graphic designer.
Kash, you are a hero. Thank you.
Kristin, thank you so much for the kind comment! Glad I was able to help!
Thank you! Couldn’t figure out how Hostinger was setting that. Now auto-update is enabled for everything.
Tyger, I’m glad it worked out for you!
Thanks man, this solved the sneaky Hostinger blocking auto-updating problem.
Happy to help, Ted!
Thanks a ton!!..
My pleasure!
Even Chat GPT couldn’t figure this out. Thank you!!!!
Lol…you are welcome! – Kash
Thank you so much for this information. I was able to resolve this issue in just a few minutes thanks to your post! I appreciate you taking the time to write this up.
You’re welcome! – Kash